Saat ini saya akan sharing tentang bagaimana cara installasi
mikrotik dengan GNS3. Caranya cukup mudah, silahkan simak dibawah ini
A. Tujuan
the goal of installation mikrotik is :
the goal of installation mikrotik is :
1. Mengetahui
bagaimana cara menginstall Mikrotik
Knowing how to installation router OS
Knowing how to installation router OS
2. Mengetahui
cara mengistall Mikrotik dengan menggunakan GNS3
Knowing how to installation router OS using GNS3
Knowing how to installation router OS using GNS3
B. Persiapan
1. Aplikasi
GNS3
2. Iso
mikrotik
MikroTik
adalah sistem operasi dan perangkat lunak yang dapat digunakan untuk menjadikan
komputer menjadi router network yang handal, mencakup berbagai fitur yang
dibuat untuk IP network dan jaringan wireless, cocok digunakan oleh ISP,
provider hotspot, & warnet. Mikrotik mulai didirikan tahun 1995 yang pada
awalnya ditujukan untuk perusahaan jasa layanan Internet (PJI) atau Internet
Service Provider (ISP) yang melayani pelanggannya menggunakan teknologi
nirkabel atau wireless. Mikrotik dibuat oleh MikroTikls sebuah perusahaan di
kota Riga, Latvia.
Mikrotik is Operating System and Software can be used to
make computer Become A reliable network router. Mikrotik began to be
established in 1995 which was originally intended for enterprise Internet
service ( ISP ) or an Internet Service Provider ( ISP) serves customers using
wireless technology or wireless.
D. Langkah-Langkah
Steps to installation MIKROTIK
Steps to installation MIKROTIK
1. Salin iso mikrotiknya pada local disk C, program files lalu pada folder GNS3 nya
Copy iso mikrotik on the local disk C, then the program
files folder of his GNS3
2. Jika
sudah dicopy, kemudian buka cmd nya lalu klik kanan pilih run administrator
Search CMD on start menu, then right click select RUN
Administrator
3. Kemudian
Masukkan perintah berikut untuk masuk ke direktori GNS3nya, lalu tambahkan
perintah qemu nya seperti berikut
Then, enter the following command to enter the directory
GNS3, then add the qemu command like the following
4. Install
mikrotiknya pada cmd dengan perintah seperti berikut ini
Start installation in CMD with a command like this
Ini adalah bagian dari proses instalasi mikrotik
This is the passage of the installation mikrotik process
5. Saat
proses penginstallan akan muncul tampilan seperti berikut, kita pilih semua
pilihannya, agar cepat klik a kemudian tekan i
When the installation process will appear as follows,
6. Kemudian
akan ada pertanyaan apakah kita ingin konfigurasi dan melanjutkannya, lalu
tuliskan y
Then there will be a question of whether we want to
continue the configuration and then write y
7. Jika
diminta untuk reboot, kita reboot saja kemudian jika sudah selesai reboot kita tutup saja
If requested to reboot , we just reboot when done reboot
then we close it
8. Sekarang
buka aplikasi GNS3 nya, kemudian pilih menu edit a preference
Now open GNS3 application, then select the edit menu a preference
Pilih bagian menu Qemu, seperti biasa kita klik test settingsnya hingga muncul bacaan hijau
Select the section of the menu QEMU, as usual we click test settings until the green reading
Now open GNS3 application, then select the edit menu a preference
Pilih bagian menu Qemu, seperti biasa kita klik test settingsnya hingga muncul bacaan hijau
Select the section of the menu QEMU, as usual we click test settings until the green reading
9. Jika
sudah muncul bacaan berwarna hijau, kemudian pilih tab qemu guest, lalu isikan
qemu guest settingsnya seperti berikut ini
If it appears green reading , then select the tab guest
qemu , qemu guest settings then fill in the following
10. Jika
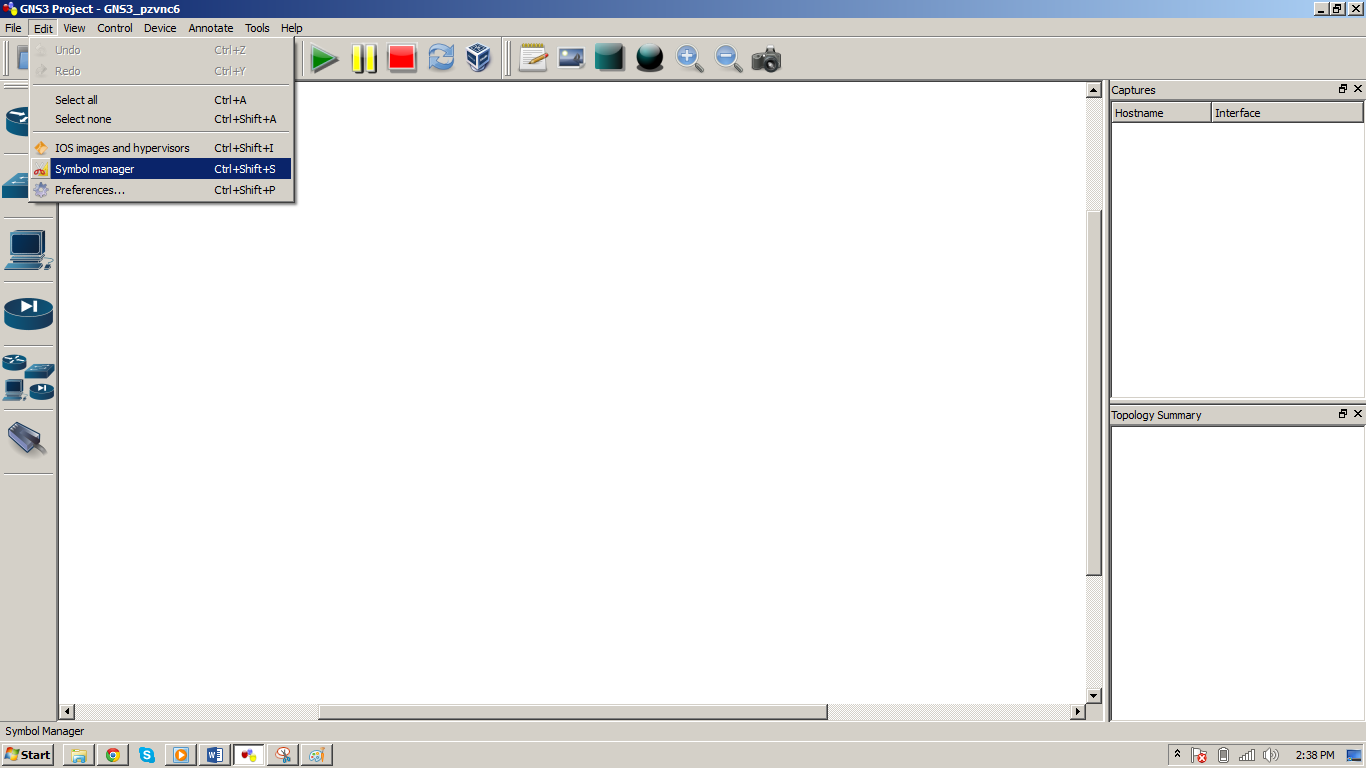
sudah lalu kita kembali ke menu edit lagi tetapi kali ini pilih symbol manager
If it’s then we go back to the edit menu again but this time select the symbol manager

jika sudah masuk cari symbol router kemudian kasih name, dan typenya kita pakai qemu guest
if it's in search for a symbol of the router and then give the name, and we use qemu guest type
If it’s then we go back to the edit menu again but this time select the symbol manager

jika sudah masuk cari symbol router kemudian kasih name, dan typenya kita pakai qemu guest
if it's in search for a symbol of the router and then give the name, and we use qemu guest type
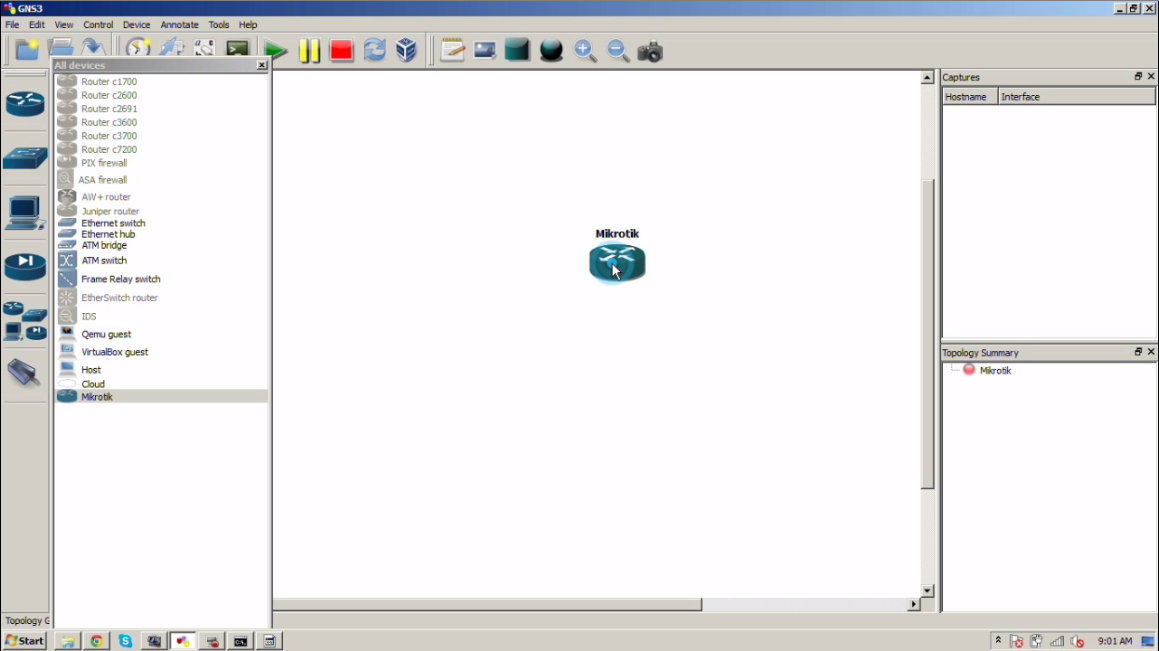
11. Pilih browse
all device kemudian pilih symbol routernya
Select browse all devices and then select the symbol router
12. Kemudian
jalankan devicenya
Then run the device's
13. Saat
dijalankan secara otomatis akan masuk ke Mikrotik dan melakukan booting
When executed automatically be entered into Mikrotik and
booting
14. Tahap
installasi selesai, sekarang masukkan user dengan name “admin” untuk
passwordnya kosongkan saja, jadi langsung klik enter
The installation process is finished , now enter the user
name "admin"
for the password blank , so just click enter
15. Berhasil
masuk ke Mikrotiknya dengan menggunakkan user
Successful entry into Mikrotik with user admin
Untuk
lebih jelasnya tentang tahap installasi mikrotik bisa dilihat juga disini https://www.youtube.com/watch?v=eQnOAORCFNE


