Apa itu DHCP?
What is the DHCP?
DHCP (Dynamic Host Configuration Protocol) adalah sebuah mekanisme yang memungkinkan sebuah server untuk memberikan IP Address secara dinamik kepada client.
DHCP ( Dynamic Host Configuration Protocol ) is a mechanism that allows a server to assign IP addresses dynamically to the client.
Bagaimana cara kerja DHCP?
How does DHCP work ?
1. Masuk dahulu ke server manager dengan klik start lalu administrative tools
First entry into the server manager to click start and administrative tools
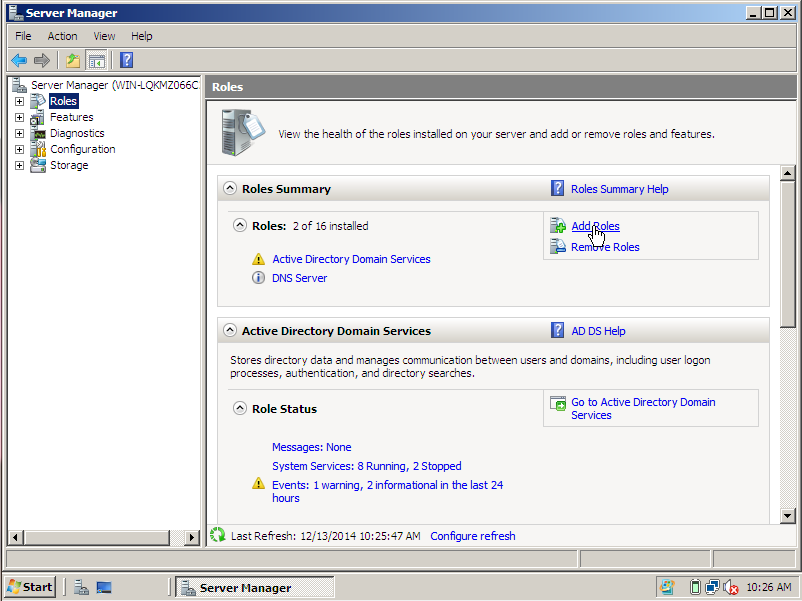
2. Bila sudah masuk Server Manager lalu klik roles dan pilih add roles
When it entered the Server Manager and click the roles and select add roles
3. Pada tampilan ini kita klik next saja
In this view we just click next
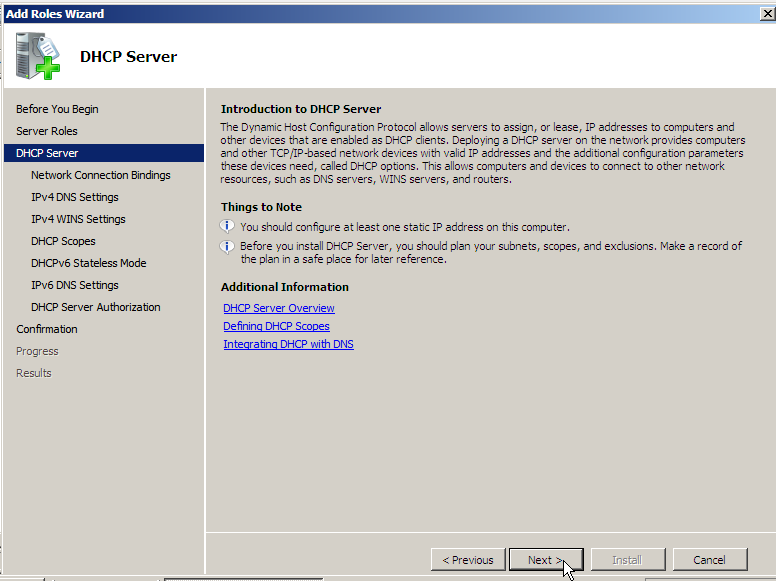
4. Klik pada kotak DHCP Server kemudian pilih next
Click on the box DHCP Server and then select next
5. Pada tahap ini hanya klik next
At this step, just click next
6. Selanjutnya kita isi parent domainnya yang sebelumnya telah dibuat dan isi IP nya dengan IP server lalu klik next
Next we fill the parent domain that has previously been made and the contents of their IP with the IP server and then click Next
7. Pada tahap ini kita klik next saja
At this step, just click next
8. Selanjutnya kita isi add scopenya, pada starting dan ending IP di isi sesuai yang kita inginkan dan klik ok
Next we add the contents of scopenya , the starting and ending IP in the content as we want and click ok
9. Pada tahap ini hanya klik next saja
At this step, just click next
10. Pilih enable DHCPv6 lalu klik next
Select enable DHCPv6 and then click Next
11. Lalu isikan kembali parent domainnya kemudian next
Then fill in the parent domain back later next
12. Pilih use current lalu klik next
Select the current use and then click Next
13. Selanjutnya tinggal kita install saja
Furthermore, we just install
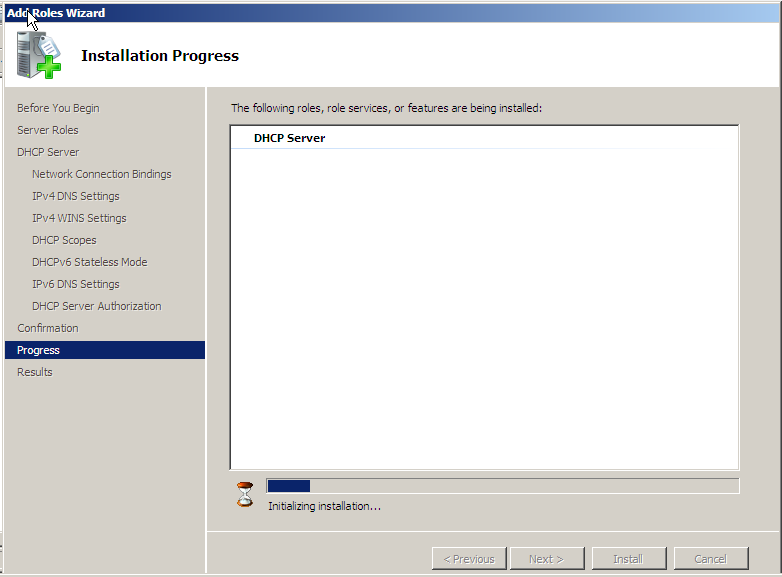
14. Tunggu hingga installasi selesai
Wait until the installation is complete
15. Installasi selesai
Installation is complete
16. Buka DHCP nya pada administrative tools nya
Open the DHCP administrative tools
17. Klik kanan pada IPv4, kemudian pilih new scope
Right click on IPv4, and then select the new scope
18. Klik next
Click next
19. Kemudian kita isi namanya scope barunya lalu next
Then we fill in the name of his new scope and next
20. Kemudian isi starting dan ending IP yang kita inginkan lalu klik next
Then fill the starting and ending IP that we want and then click Next
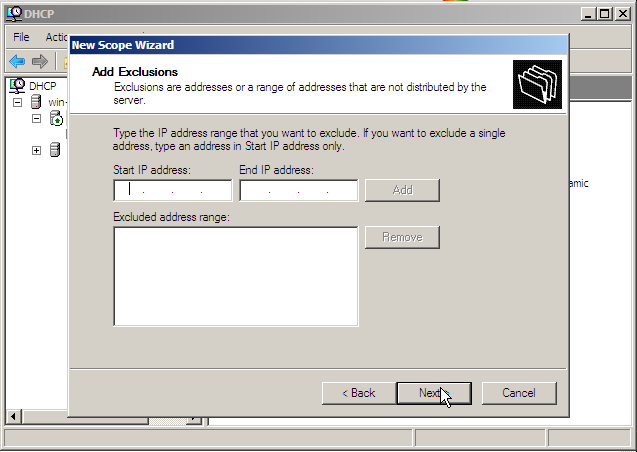
21. Pada tahap ini kita langsung next saja, karena ini adalah tahap untuk memilih IP yang dilarang
At this stage we are directly next course, since this is the stage to select the IP banned
22. Pilih next
select next
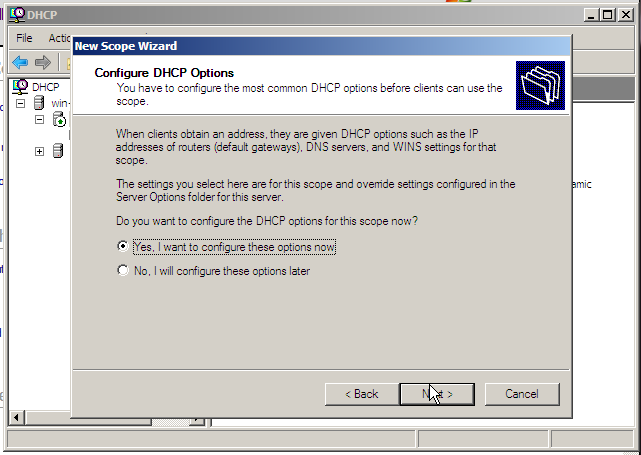
23. Pilih yes untuk konfigurasi selanjutnya lalu klik next
Select yes for further configuration and then click Next
24. Masukkan default gatewaynya lalu klik add selanjutnya next
Enter the default gateway and click to add further next
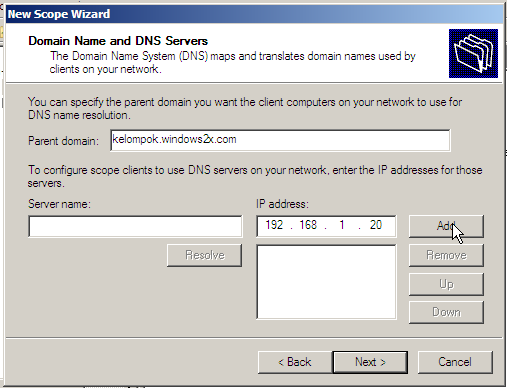
25. Pada tahap ini masukkan parent domain dan IP servernya lalu klik add dan next
At this stage the parent domain and enter the server IP and then click add and next
26. Pada tampilan WINS Servers langsung kita next saja
On the WINS Servers view directly our next course
27. Pada active scope kita pilih yes lalu next
In the scope of our active select yes and next
28. Tahap membuat scope selesai
Step create scope finished
29. Buat IP pada windows 7 kemudian OK
Create IP in Windows 7 then OK
30. Lalu ubah kembali menjadi obtain, ini berfungsi untuk memancing agar IPv4 dapat terbaca
Then change back into Obtain , this serves to provoke in order to IPv4 readable
31. Klik details untuk mengetahui apakah IP sudah terbaca atau belum
Click details to find out whether the IP has been read or not
32. Sekarang kita cek di windows servernya apakah sudah terbaca atau belum
Now we check in windows server if it is legible or not
33. Sekarang kita lanjut ke 2 scope
Now we go to the second scope
34. Masukkan start dan End IP kembali, usahakan jangan sama dengan sebelumnya
Enter the start and End IP back , try to do the same with the previous
35. Sama seperti sebelumnya pada tahap ini hanya kita next saja karna ini pembagian IP yang dilarang
Same as before at this stage we are only just because of this division next IP banned
36. Pilih next saja
Select the next
37. Selanjutnya pilih yes, lalu klik next
Then select yes, then click next
38. Pada default gateway tentu akan beda dari sebelumnya, setelah diisi klik add dan next
On the default gateway will certainly be different from the previous , after filling click add and next
39. Isi parent domain dan Ip address lalu klik add dan next
Fill the parent domain and Ip address and click add and next
40. Sama seperti sebelumnya pada tahap WINS Server tinggal klik next saja
Same as before on stage just click the next WINS Server only
41. Kemudian pilih yes lalu next
Then select yes and next
42. Tahap pembuatan 2 scope selesai
step 2 scope manufacture finished
43. IP sudah terbaca
IP has been read
Demikian hasil praktek tutorial saya tentang DHCP
so the result of my tutorial practice on DHCP