


Apa itu DHCP?
What is the DHCP?
DHCP ( Dynamic Host Configuration Protocol ) is a mechanism that allows a server to assign IP addresses dynamically to the client.
Bagaimana cara kerja DHCP?
How does DHCP work ?
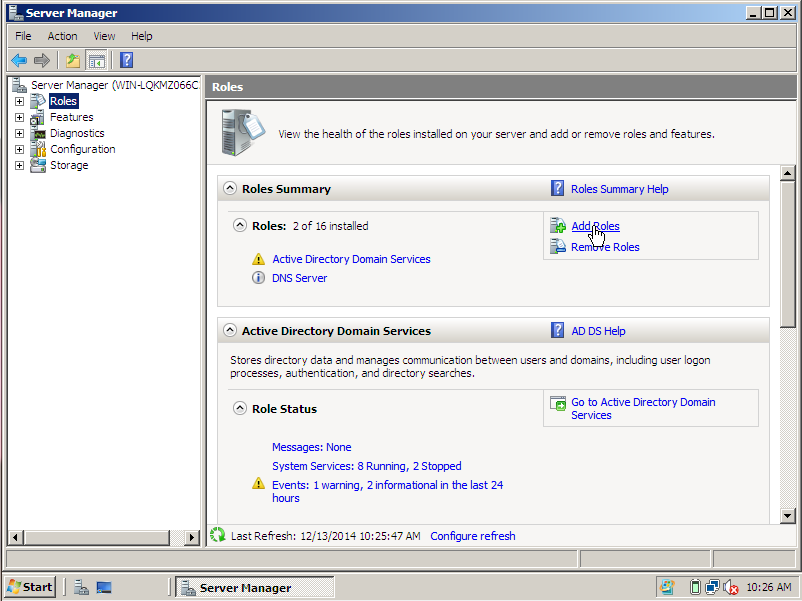
1. Masuk dahulu ke server manager dengan klik start lalu administrative tools
First entry into the server manager to click start and administrative tools
First entry into the server manager to click start and administrative tools

When it entered the Server Manager and click the roles and select add roles
In this view we just click next

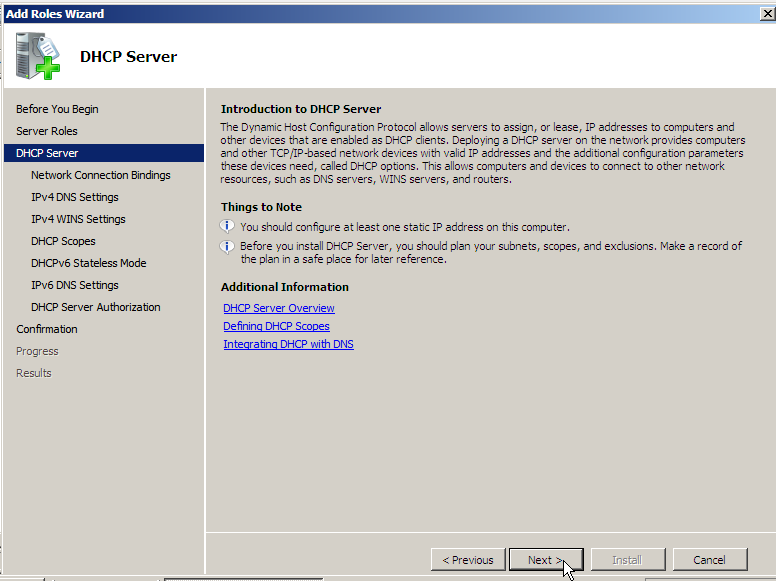
Click on the box DHCP Server and then select next

At this step, just click next

Next we fill the parent domain that has previously been made and the contents of their IP with the IP server and then click Next

At this step, just click next

Next we add the contents of scopenya , the starting and ending IP in the content as we want and click ok

At this step, just click next

Select enable DHCPv6 and then click Next

Then fill in the parent domain back later next

Select the current use and then click Next

Furthermore, we just install

Wait until the installation is complete
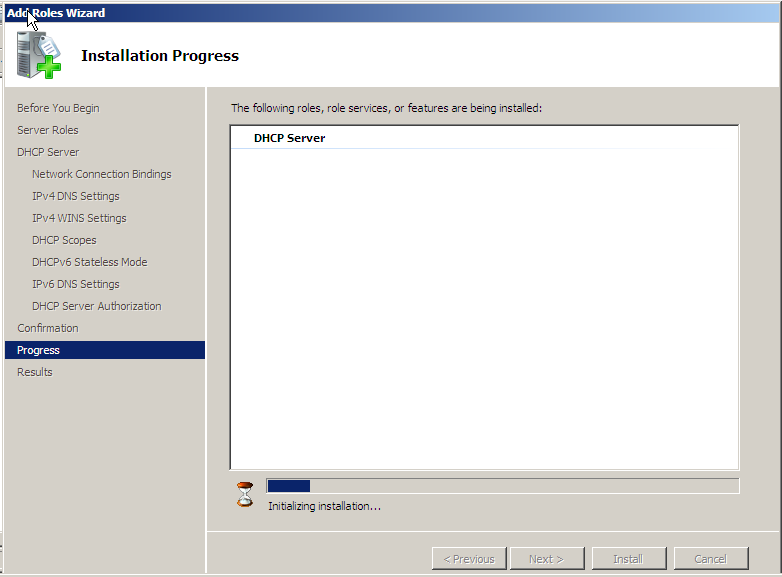
Installation is complete

Open the DHCP administrative tools

Right click on IPv4, and then select the new scope

Click next

Then we fill in the name of his new scope and next

Then fill the starting and ending IP that we want and then click Next

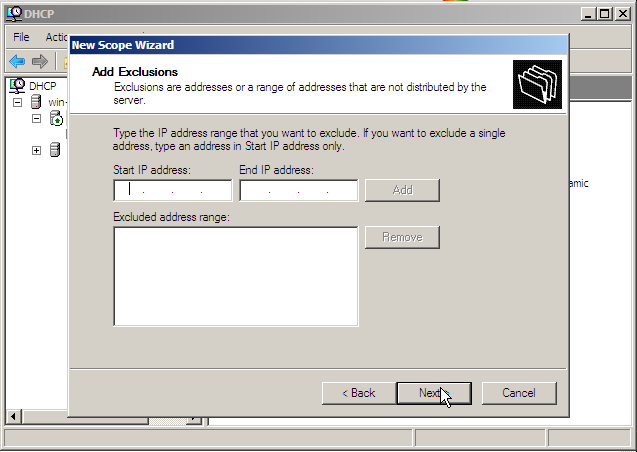
At this stage we are directly next course, since this is the stage to select the IP banned
select next

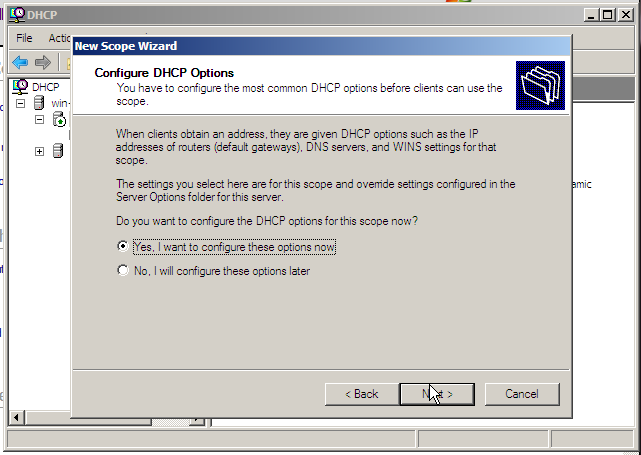
Select yes for further configuration and then click Next
Enter the default gateway and click to add further next

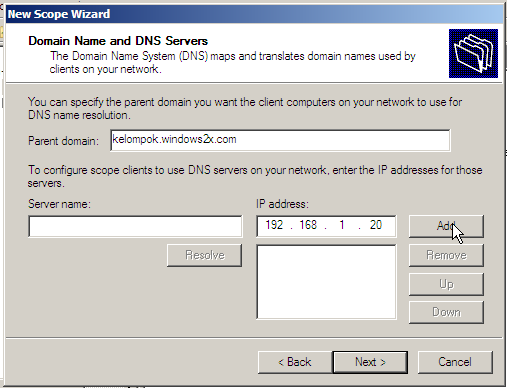
At this stage the parent domain and enter the server IP and then click add and next
On the WINS Servers view directly our next course

In the scope of our active select yes and next

Step create scope finished

Create IP in Windows 7 then OK

Then change back into Obtain , this serves to provoke in order to IPv4 readable

Click details to find out whether the IP has been read or not

Now we check in windows server if it is legible or not

Now we go to the second scope

Enter the start and End IP back , try to do the same with the previous

Same as before at this stage we are only just because of this division next IP banned

Select the next

Then select yes, then click next

On the default gateway will certainly be different from the previous , after filling click add and next

Fill the parent domain and Ip address and click add and next

Same as before on stage just click the next WINS Server only

Then select yes and next

step 2 scope manufacture finished

IP has been read

Demikian hasil praktek tutorial saya tentang DHCP
so the result of my tutorial practice on DHCP
